A Claude workspace groups API keys, members, and spend limits into a named container within your organization. Admins create workspaces to isolate API usage and billing by team, project, or environment. Production and development environments, or separate product teams, each stay within their own spend cap and key pool.
In this guide, we'll walk through two methods to create a workspace in the Claude Console:
You can create a workspace in the Claude Console to isolate API keys, spend, and configurations by project or team. Use the Console when you need to separate API usage and billing across environments like production, staging, or development within your organization. You must be an Organization Admin to create workspaces in the Claude Console.
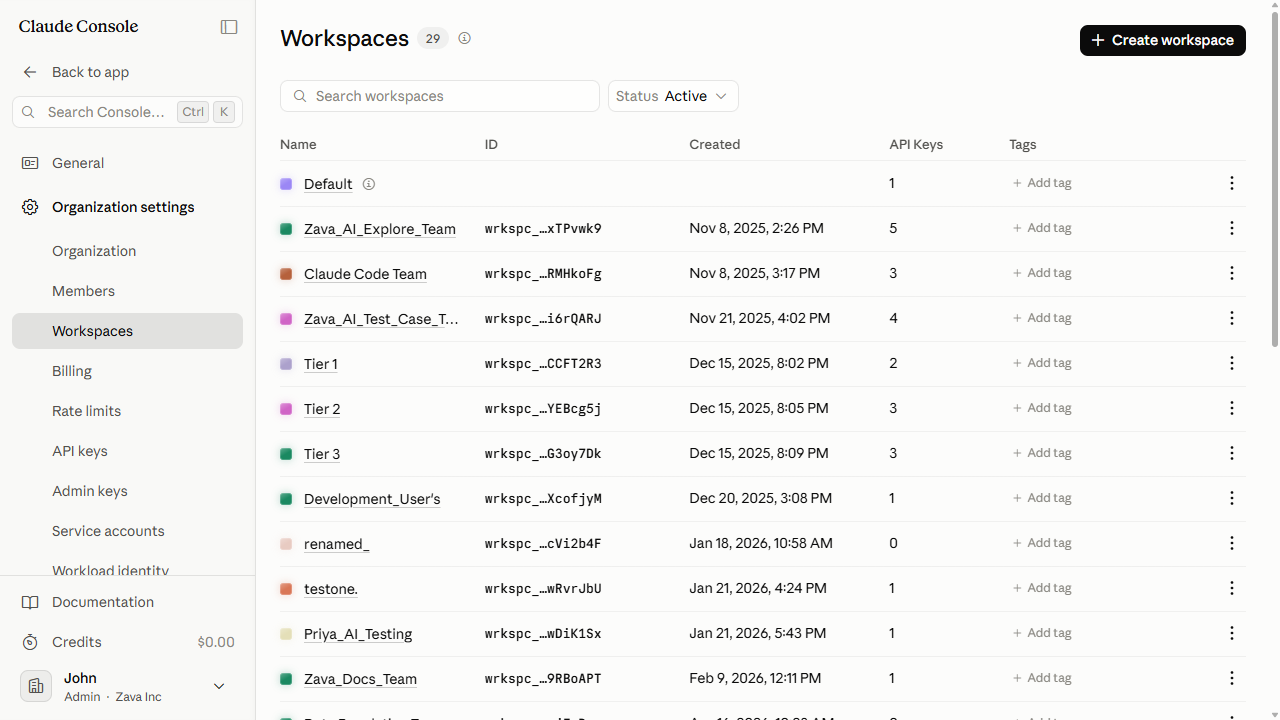
Navigate to Organization settings > Workspaces in the sidebar. The Workspaces page lists all existing workspaces with their IDs, creation dates, and API-key counts.
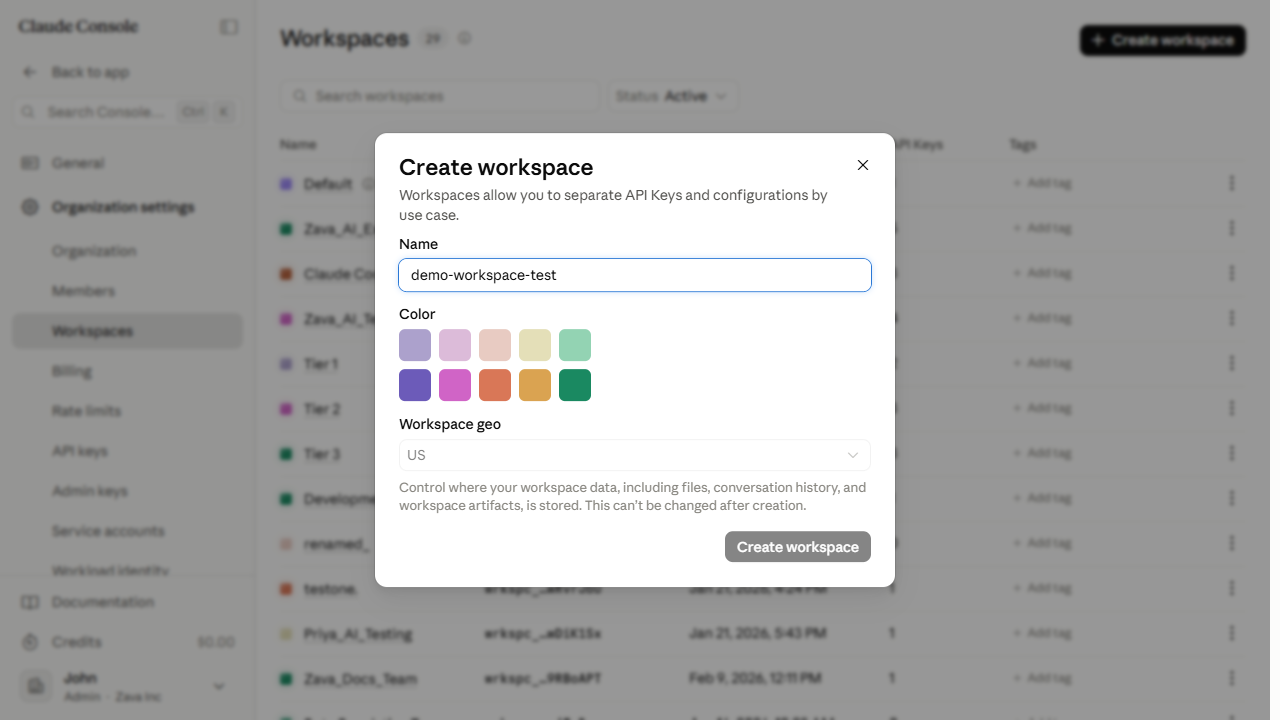
Click Create workspace in the top-right corner of the Workspaces page. A Create workspace dialog opens with three fields.
Enter a name for the workspace in the Name field.
Select a color swatch under Color. The Create workspace button stays disabled until a color is chosen, even though it appears clickable without one.
Under Workspace geo, review the region setting. This controls where workspace data (files, conversation history, and artifacts) is stored. The field is not editable in this org and appears fixed after creation; confirm against current Anthropic docs.
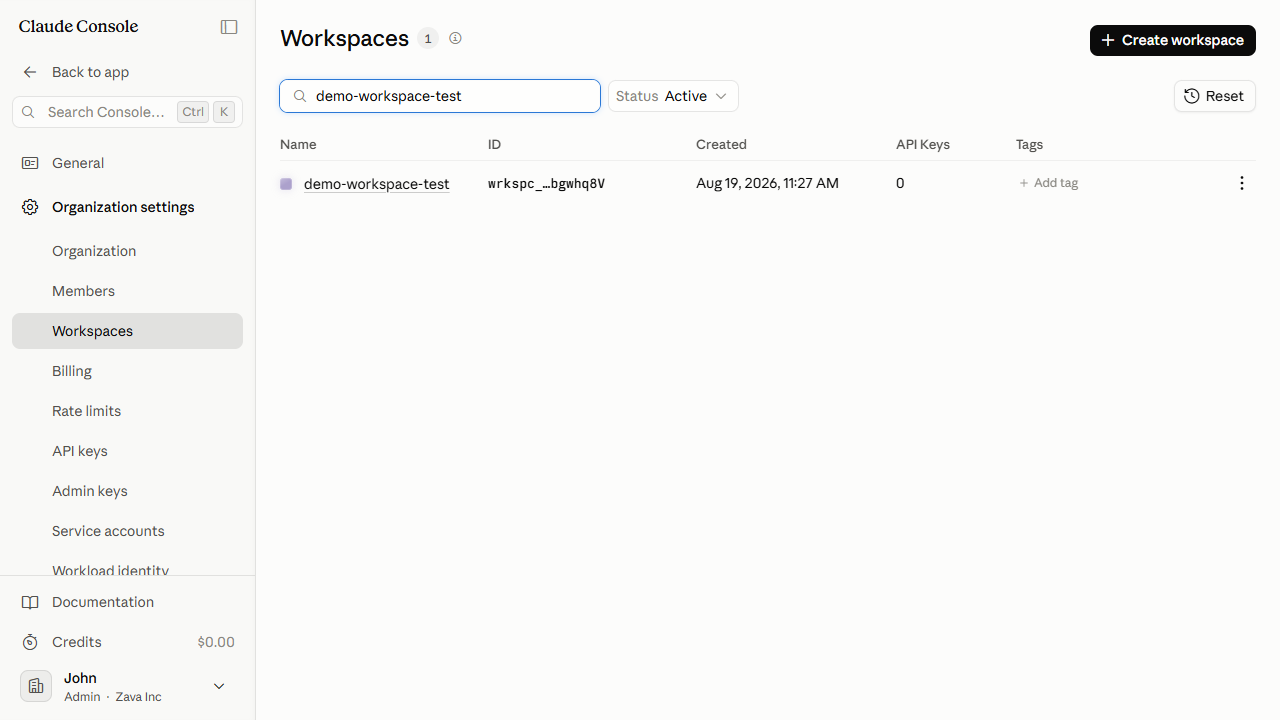
Click Create workspace at the bottom of the dialog. The dialog closes and the new workspace row appears in the Workspaces list with its workspace ID and zero API keys. If the row does not appear immediately, reload the page or search by name.
Best Practices for Creating a Claude Console Workspace
Name each workspace to reflect its purpose. Labels like "Production - Customer Chatbot" or "Dev - Internal Tools" stay clear as the organization grows.
Verify the workspace geo before confirming. If you need a different region, create a separate workspace for it.
Set a monthly spend limit on the workspace right after creation. The create dialog has no spend-limit field. Open the workspace and set it on the workspace Limits tab to prevent unexpected charges.
Create API keys inside the workspace before connecting any services. API keys belong to the workspace where they are created and cannot be moved to a different workspace.
To remove a workspace from active use, open the ⋮ menu on its row in the Workspaces list and select Archive workspace. Archiving a workspace archives all API keys in it and disables them.
Create a Claude Workspace using Admin365
You can create a Claude workspace from the Workspace Management inventory. Use this when provisioning workspaces for new teams or projects, or when you need to manage multiple Claude organizations from a single Admin365 portal.
Steps to Create a Claude Workspace in Admin365
Sign in to the Admin365 portal with your administrator credentials.
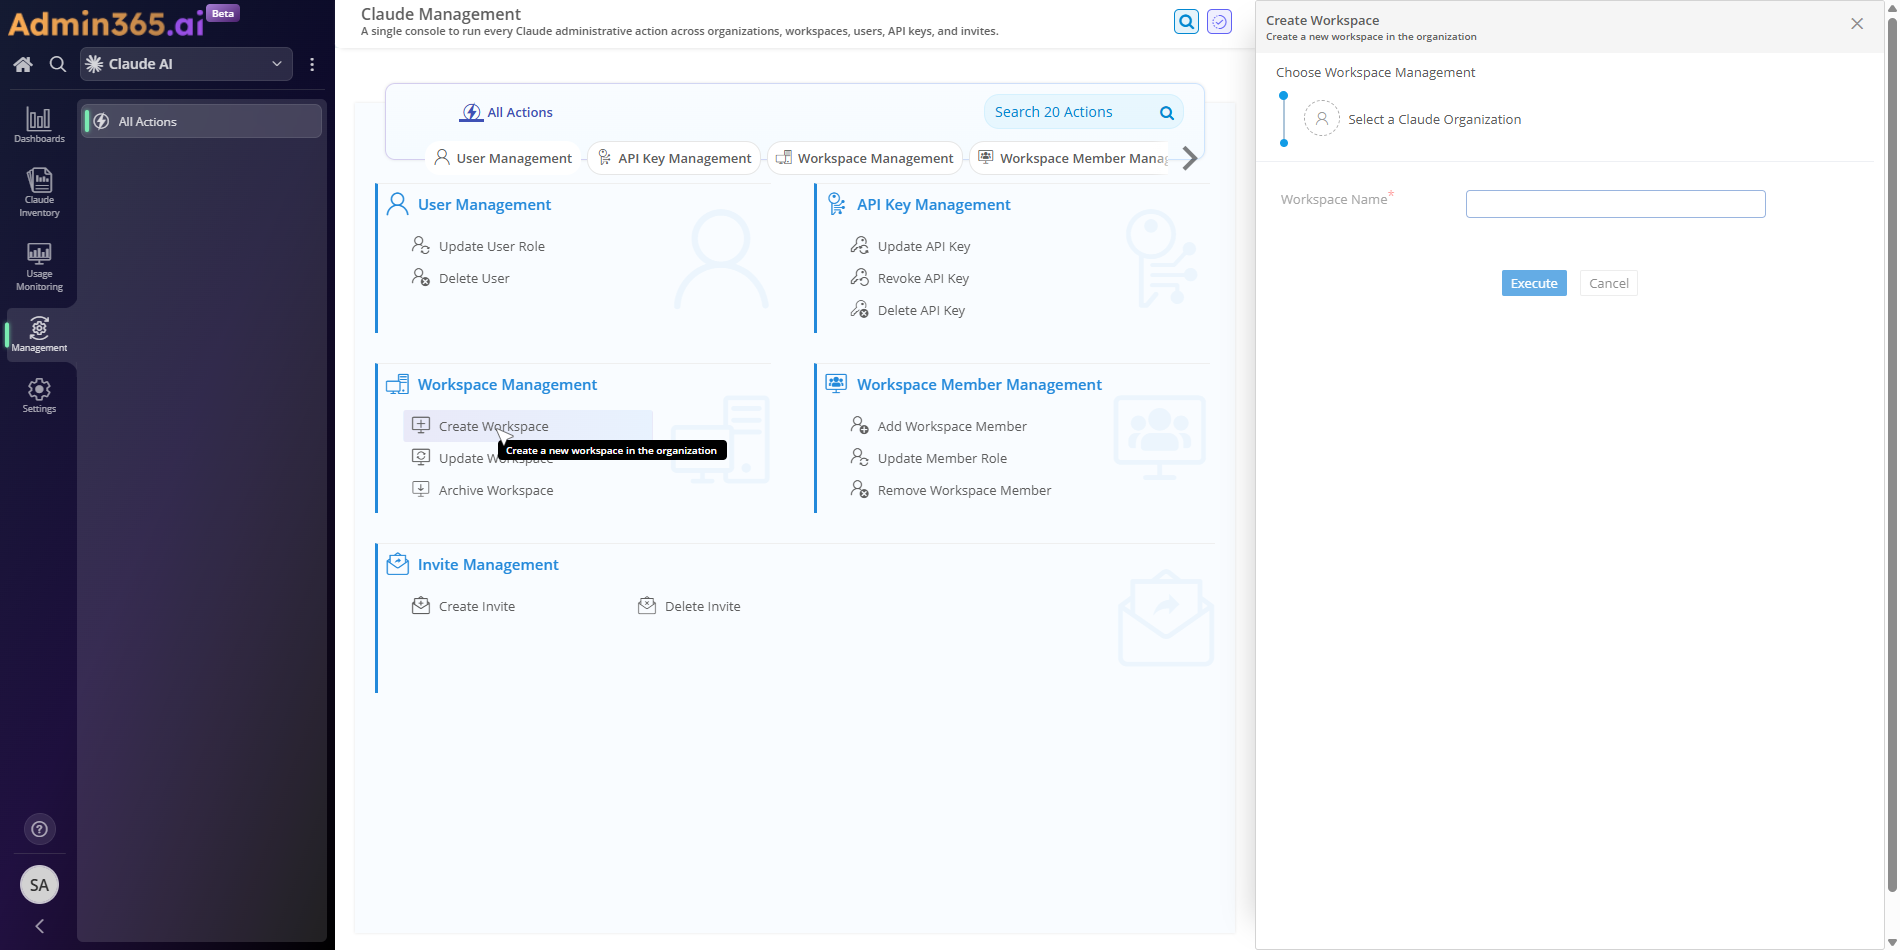
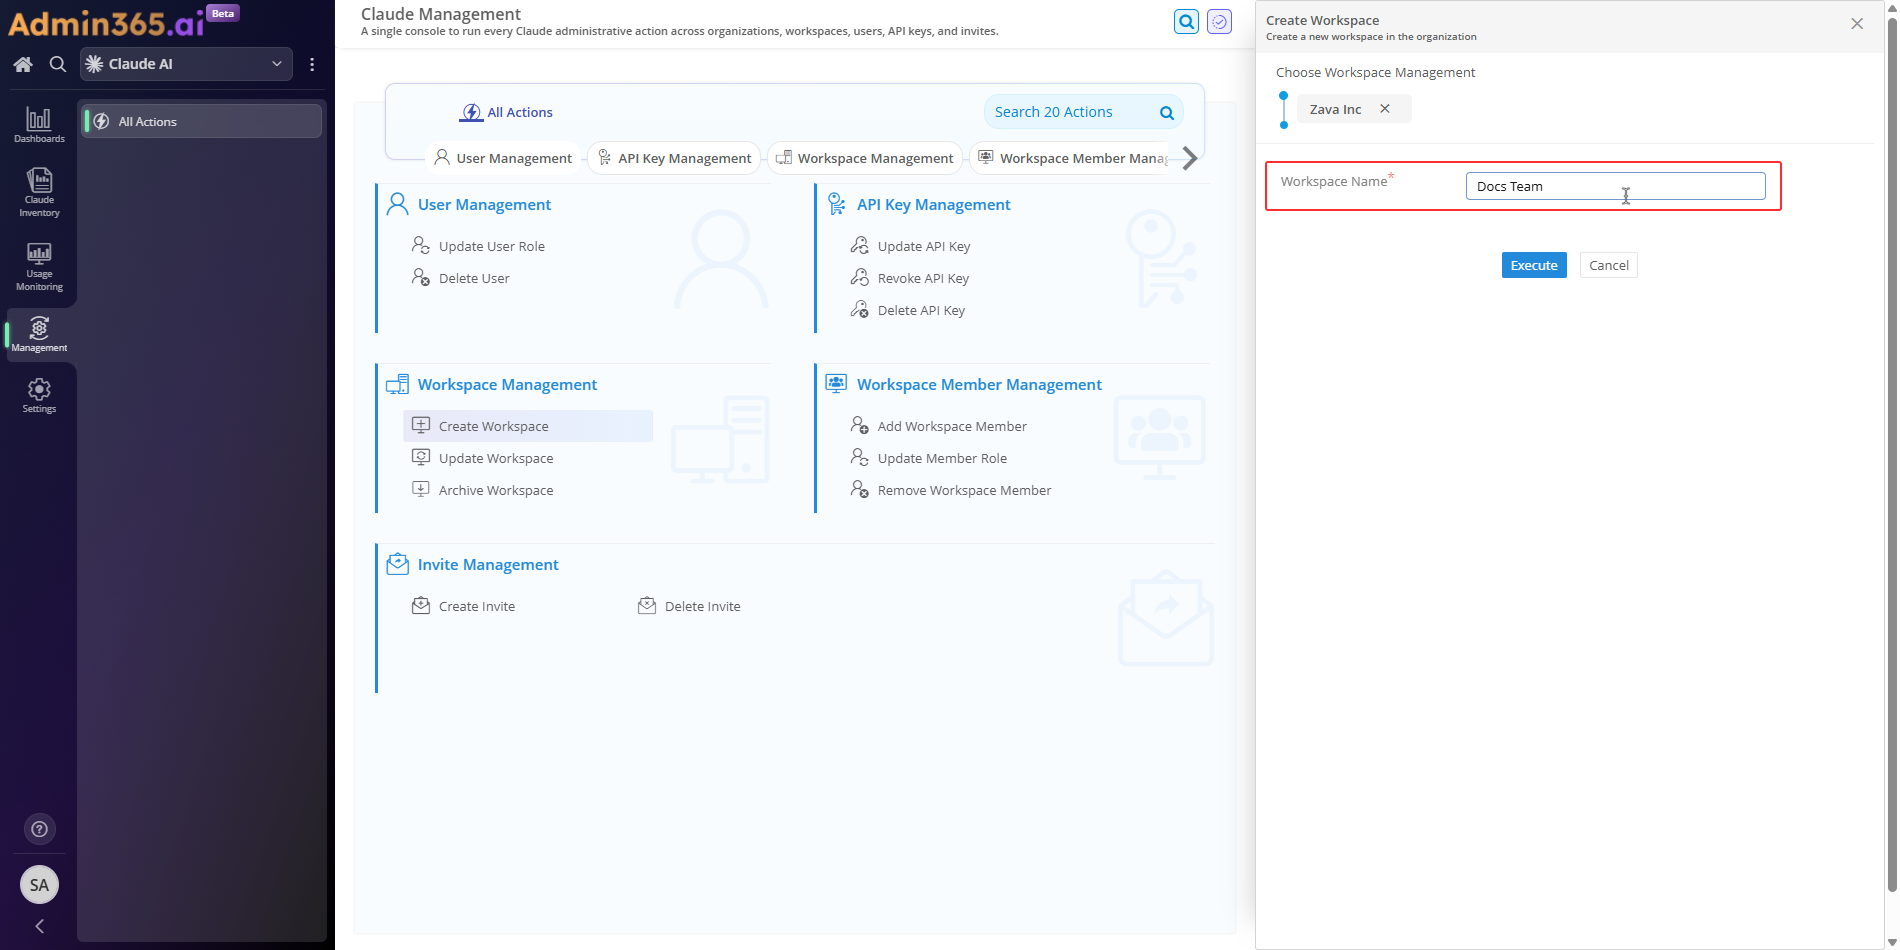
In Admin365, go to Management > Workspace Management, then click Create Workspace.
Enter a name in the Workspace Name field that identifies the workspace's purpose, such as "Dev - Internal Tools". A clear name is the primary way to locate and differentiate workspaces in Admin365 after creation.
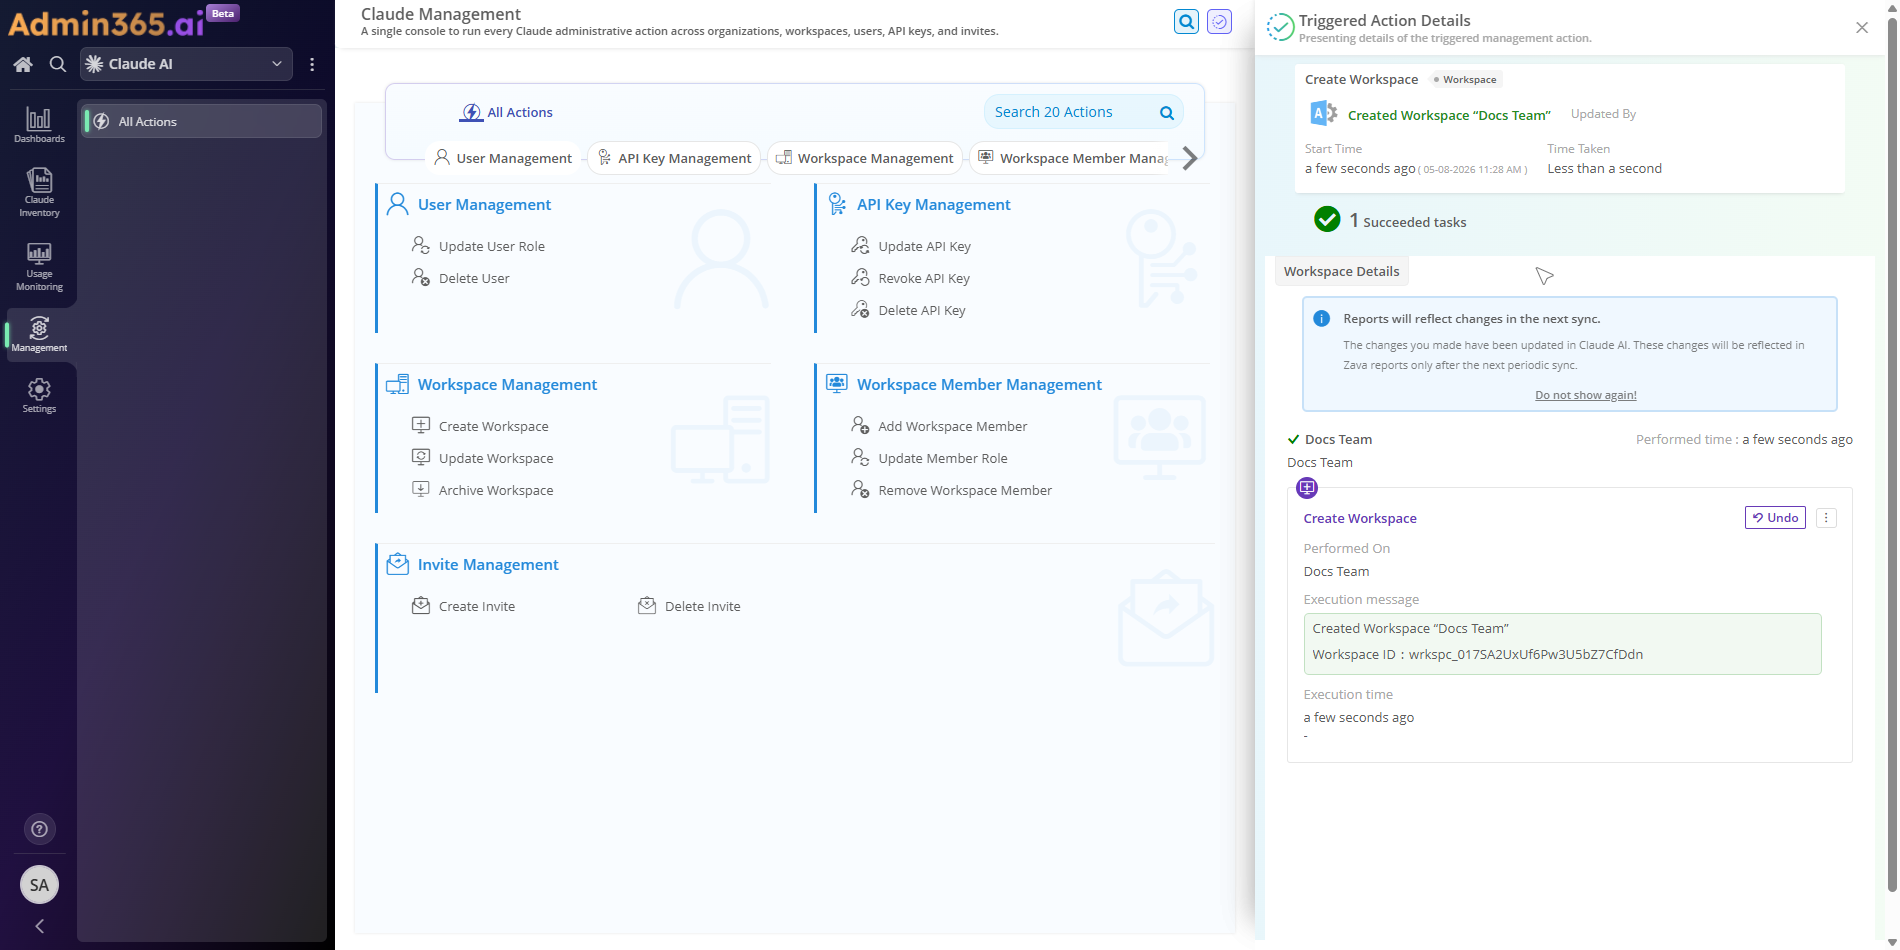
Click Execute. Admin365 confirms the workspace was created.
Why Admin365 for Claude Workspace Management
Teams managing workspace provisioning across multiple organizations create workspaces for every organization from one Admin365 portal, without signing in to each Claude organization separately.
Provision workspaces for every Claude organization from one console, without switching accounts or re-authenticating for each org.
One Workspace Management inventory lists workspaces across all your organizations, so naming and governance stay consistent as teams scale.
Delegate workspace creation to your admins without handing out separate sign-in access to each Claude organization.
Admin365 Tip: Confirm the Organization Before Creating a Workspace
If your Admin365 session covers multiple Claude organizations, confirm the correct organization is active before clicking Execute. Workspaces are scoped to the organization they are created in. To correct a mis-assigned workspace, archive it and create a new one in the intended organization.
Common Errors When Creating a Workspace in the Claude Console
These are the errors admins encounter when creating a Claude workspace through the Console or via Admin365. Match the message you see to the entry below, then follow the resolution.
Only Organization Admins Can Create Workspaces in the Claude Console
Error:
Only organization admins can create workspaces. Organization users and developers must be added to workspaces by an admin.
What it means: The acting account holds an organization User, Developer, or Billing role instead of the Organization Admin role that creating a workspace requires.
Solution: Have an existing Organization Admin create the workspace, or ask an Admin to promote your organization role to Admin under Settings > Organization > Members, then retry.
Workspace Limit Reached at 100 Workspaces per Organization
Error:
You are limited to 100 workspaces per organization.
What it means: The organization already has 100 active workspaces, which is the maximum Claude allows, so no new workspace can be added.
Solution: Archive an unused workspace under Settings > Workspaces so it no longer counts toward the cap, then create the new one.
Workspace Spend Limit Cannot Exceed the Organization Limit
Error:
You can set workspace limits lower than (but not higher than) your organization's limits.
What it means: A spend or rate limit was set on the new workspace higher than the organization-level limit, which the Console does not permit.
Solution: Lower the workspace limit to at or below the organization limit in the workspace Limits tab, or raise the organization limit first, then save.
Manage Claude Workspaces from One Place with Admin365
Create and manage Claude workspaces across your organizations from a single Admin365 inventory.